Baby, It’s Cold Outside!
Become the go-to shop for winterization solutions by knowing where and how to market the products they need.

As I’m writing this, the temperature in Portland, Oregon, is nearing 103 degrees. For all of you that think it’s always raining here, trust me — it’s not. Thinking about winterizing right now feels surreal. From June through September, we may get one or two days of rain. Like most of the northern states, it can get very chilly starting in late October, and most RVers start looking at winterizing their RVs as the weather shifts from an insane heat dome to the delicious cooling of fall.
First-time RVers rarely have any idea how and when to winterize their RVs. Even more experienced people may forget from year to year exactly what they need to do and buy to prep their rigs for travel or storage. Googling it works, but learning it from you is far better. When they look at the written information provided by you (with your name and logo on top), they will be reminded that you are the experts. To educate and remind your customers about how to prepare for winter, you need to look at how you’re educating them with physical handouts, in your store and online.
Handouts: The information can be split into two brochures or single sheet handouts — for storage, driving from cold to heat or just cold weather prep.
This information will ideally be written in logical/sequential bullet-point sentences. After each directive, if a product is needed to accomplish the task, that product (or products) needs to be listed. At the end of the handout, create a shopping list of products that should be purchased. You don’t need to mention the vendor, just the type of product. They can shop your shelves for the product’s price point that works best for them.
Print these handouts on a better quality, thicker paper. Look for 80- to 100-pound weight paper, as the quality of the handout will reflect on your company. Regular copier paper looks and feels cheap. This is something a customer will carry around for a good length of time, so it should represent the best of your company.
Consider a good quality envelope to store the papers in as well. Of course, add your logo and all contact information on the front along with a larger, bold heading of what’s contained in the envelope. For example, Winterizing Your RV Instructions or Storing Your RV Guide. Everyone who purchases an RV should get these instructions, and consider giving them to customers who just come in for chemicals and supplies. This is a win-win: inexpensive yet excellent public relations, as well as memorable service.
In-Store Winterization: Every door in your dealership has a “power aisle” — the most traveled aisle in your dealership’s parts and accessories area that customers gravitate toward as they enter your building. If you have main door, it’s relatively easy to figure out which way customers are walking through your space. You can hire a retail company specializing in customer behavior research such as Envirosell. Or have your sales force pay attention to the “shopper’s journey” by mapping how your customers are moving through your store. If each salesperson has an overhead simplified floor and fixture plan for the dealership and parts/accessories areas, they can use a pen to draw arrows at the entry of each aisle and then simple 1s with a cross line to show five customers.
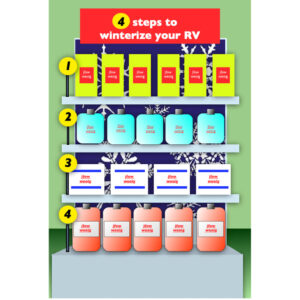
 The goal of this one- to three-week research project is to identify your power aisles. Once the main power aisle is discovered, that is where you put your winterization products. It is also where the seasonal merchandise goes for summer, holidays, etc. The aisle can be identified several ways. If it is flanked on both sides by endcaps, the signs on the top of each endcap can say something like “WINTER PREP” or something more clever. Each endcap should tell a “story.” For example, 4 Steps To Winterize Your RV. Below the sign, stock at least four (or more) products that are “musts” for proper winterization. The same signage and merchandise concept goes on the flanking endcap with different products.
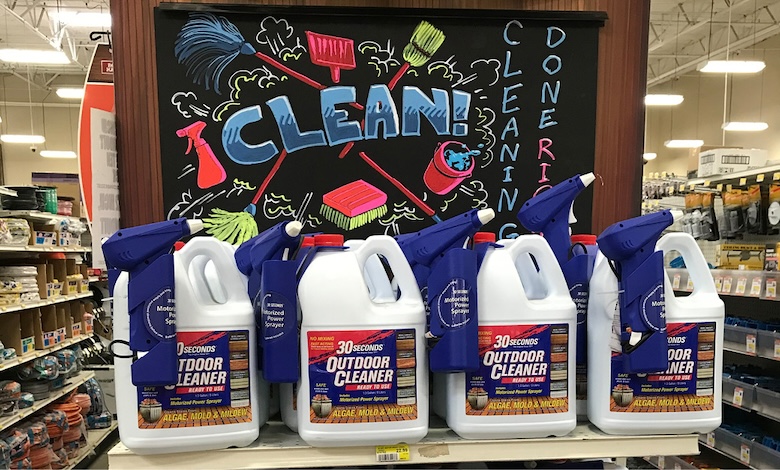
If you can’t currently add a sign to the top of your endcap, consider a chalkboard and devise a way to screw it to the backboard. Chalk paint and someone with talent can create fun signage with illustrations on the board.
Down the gondola aisle, stock your winterization products by category and use logical adjacencies. For example, if you’re selling space heaters, stock all types of space heaters next to each other, such as catalytic and small electric space heaters. Perhaps solar panels can flank electric products. Other logical adjacencies for heating would be blow dryers, heat strips, propane tanks, heater hoses, dehumidifiers, ventilation covers and more. While difficult to stock easily, heavy/lined curtains plus expanding rods to cover the inside of the windshield are gaining in popularity. They add 20 extra degrees of warmth to the RV. They may be housed best on a wall.
You can create a winter safety section on the wall at the end of the power aisle (if possible). Included in winter safety would be road safety gear, carbon monoxide detectors, smoke/fire alarms, fire blankets, chains, traction mats, emergency lights and flashlights and so on. One endcap or gondola section could carry a selection of heat tape that can work with your stock of insulation panels and skirting materials. Ice scrapers made for RVs deserve either a table or a floor standing wire unit so they can be standing up with a decent sign.
I’ve mentioned just a few of the many products that are designed for winterization. I’ve left out the chemicals, such as antifreeze. These need their own section — again, near the power aisle. You can stock them in boxes with several containers pulled out and placed on top of their boxes. As a novice, I would appreciate knowing about each one and why they are different from one other. It’s likely experienced travelers would appreciate better informative signage about the antifreeze products as well. Why buy this and not that? Which is best for each type of vehicle? Using the same size, color and type of cardstock with (at least) 12-point type, give bullet point explanations for each product.
Online Winterization Information: Whatever you have printed, make sure it’s on your website as well. As winter looms and it’s time to alert your customers, winterization information belongs on the front page of your website. This can be a link to the more extensive pages that contain your handouts, your products that can be purchased online and deeper dives into the “how-tos” for installing more complicated products. Set the winterization “box” apart with perhaps icy blue graphics in a red box. Red compels people to “Do this right now!” while icy blue indicates “Cold!”
It takes commitment to create an entire gondola/wall/endcap winter area. It means moving products from those spaces to somewhere else. People tend to hate change, and that goes for your staff as well as your customers. It annoys them when they can’t find what was “always in this place!” A great guy I know was an avid hiker. He shopped at REI fairly frequently. One day he was complaining that when he went to REI to buy a book, they had been moved. It took him a while to find the books. I asked him what was in the place where the books used to be. “Socks,” he responded in an annoyed tone. I then asked, “Did you buy socks?” He laughed and said yes — plus some books!
He knew what I was getting at: When you move things around, people will still look for what they need but will find new things to buy as well. When you create a power aisle, you showcase what your customers need now.
If you commit to becoming the go-to place for all things winterization, your reputation will be spread from one RVer to the next. No matter how easy online shopping is, touching and feeling something will never go out of style. Inspiring your customers to buy what they need by showcasing it all in the same area will make it easy for them to stay safe and warm.


